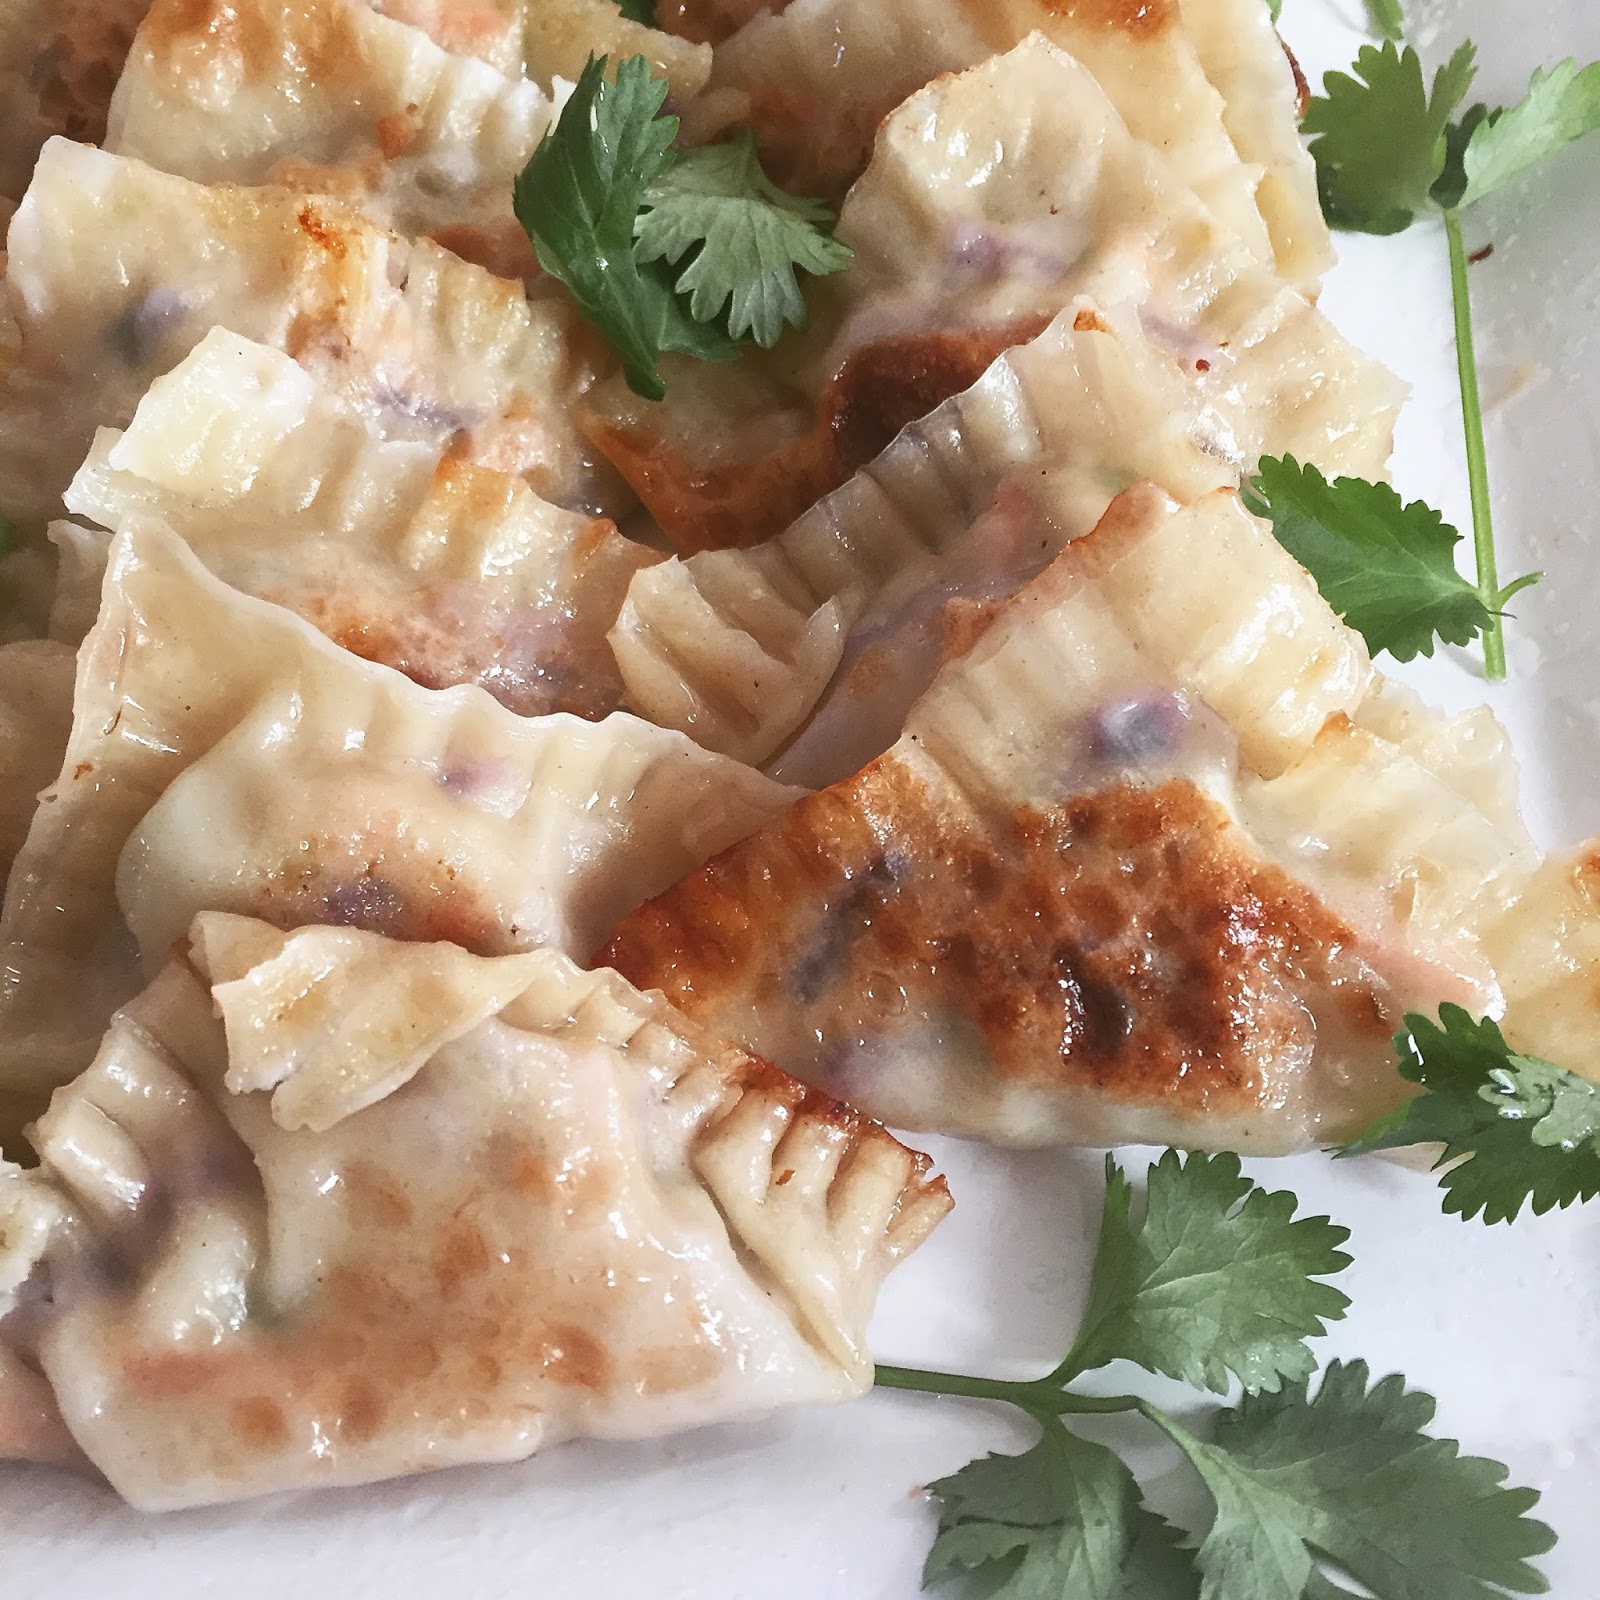
Potstickers. No, seriously:: POTSTICKERS! What day couldn’t be turned around by inhaling aaaaaaaall the potstickers? There’s a reason why these little pillows of flavor are so good; they are a complete labor of love. That being said, they are completely worth the time.
Because they are so tedious, I make them in huge quantities. This recipe makes 48 potstickers. Forty eight little individually wrapped presents for you to eat. Share them if you want to. Or don’t.
Part of the reason why I take the time to make my own is that I really haven’t found a takeout restaurant in the ‘burbs that makes a good potsticker. Another is that one order typically yields around five, which creates an awkward scenario if you’re sharing them with another person. Who gets the odd-numbered potsticker? Do you split it? Who gets the filling when you cut it in half and it doesn’t split equally? First world takeout problems solved – make these and you’ll have enough for everyone (ooooor, yourself.)
They heat up nicely in the oven and create an additional crunchiness – or they can be consumed cold if you lack the patience. Like me.
Feel free to substitute any ingredients you’d like – ground pork would be lovely as well.
Ingredients:
- 1 lb ground chicken
- 3/4 cup finely chopped carrots (make it easier on yourself and purchase the matchstick bagged version)
- 3/4 cup finely diced red cabbage
- 1/2 cup (approximately 6) diced green onions
- 2 tbsp grape seed oil
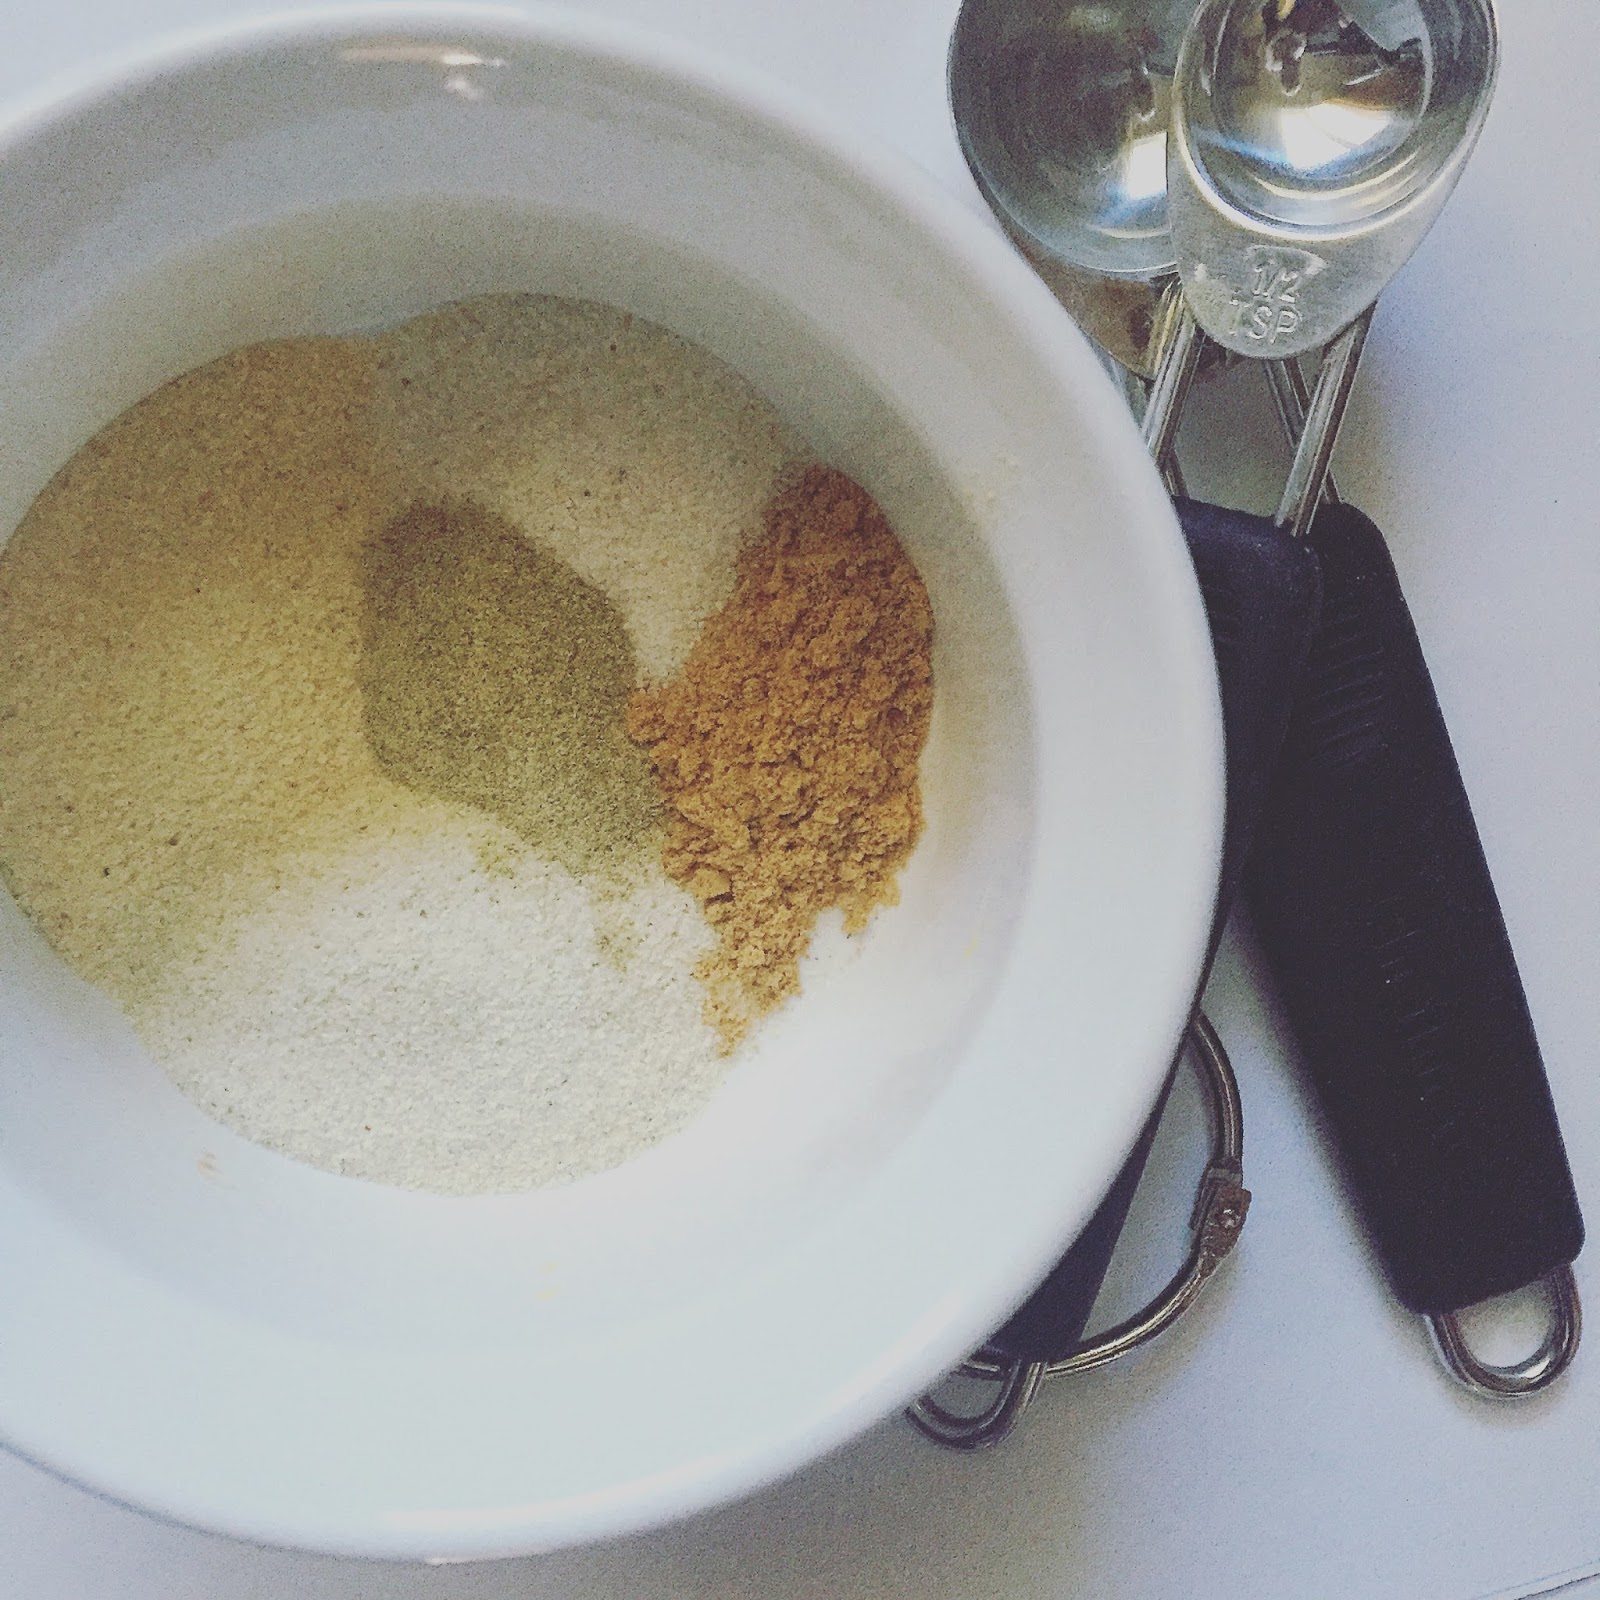
- 1.5 tsp garlic powder
- 1 tsp onion powder
- 1 tsp garlic salt
- 1 tsp ground ginger
- 1/2 tsp white pepper
- 1 package of wonton wrappers (contains 48 wrappers)
- Vegetable oil for frying
- 1 egg + 2 tbsp water for egg wash
Method:
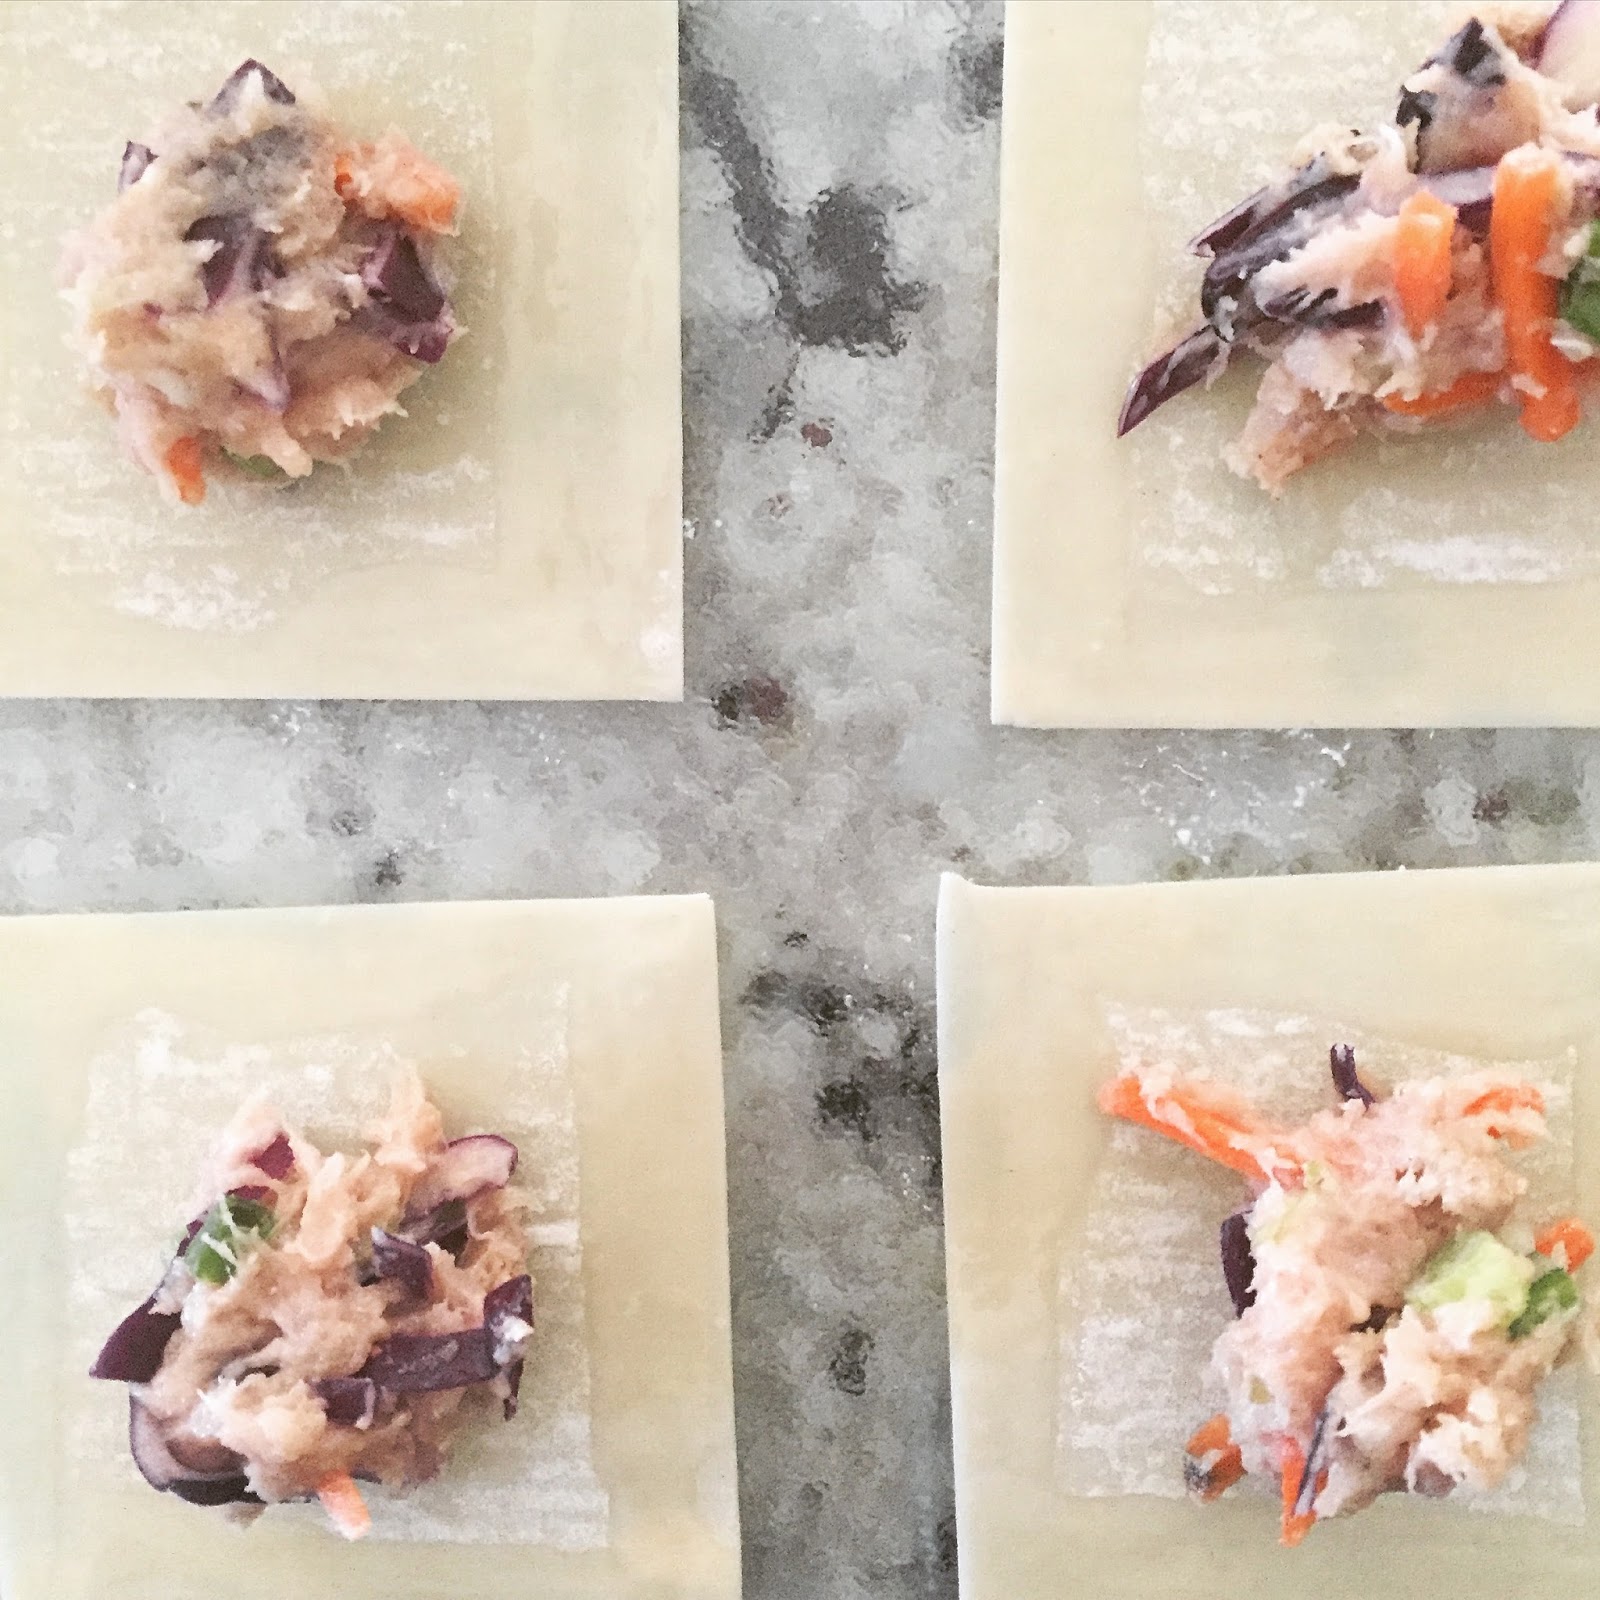
- Add the ground chicken, grape seed oil, diced vegetables and all seasonings in a large bowl. Combine ingredients with a fork.
- On a clean surface, lay out a few wonton wrappers at a time and spoon 1 tsp of the filling in the center of each wrapper. Whisk together the egg & water in a small bowl and brush the four inner edges of the wrapper with egg wash using your finger.
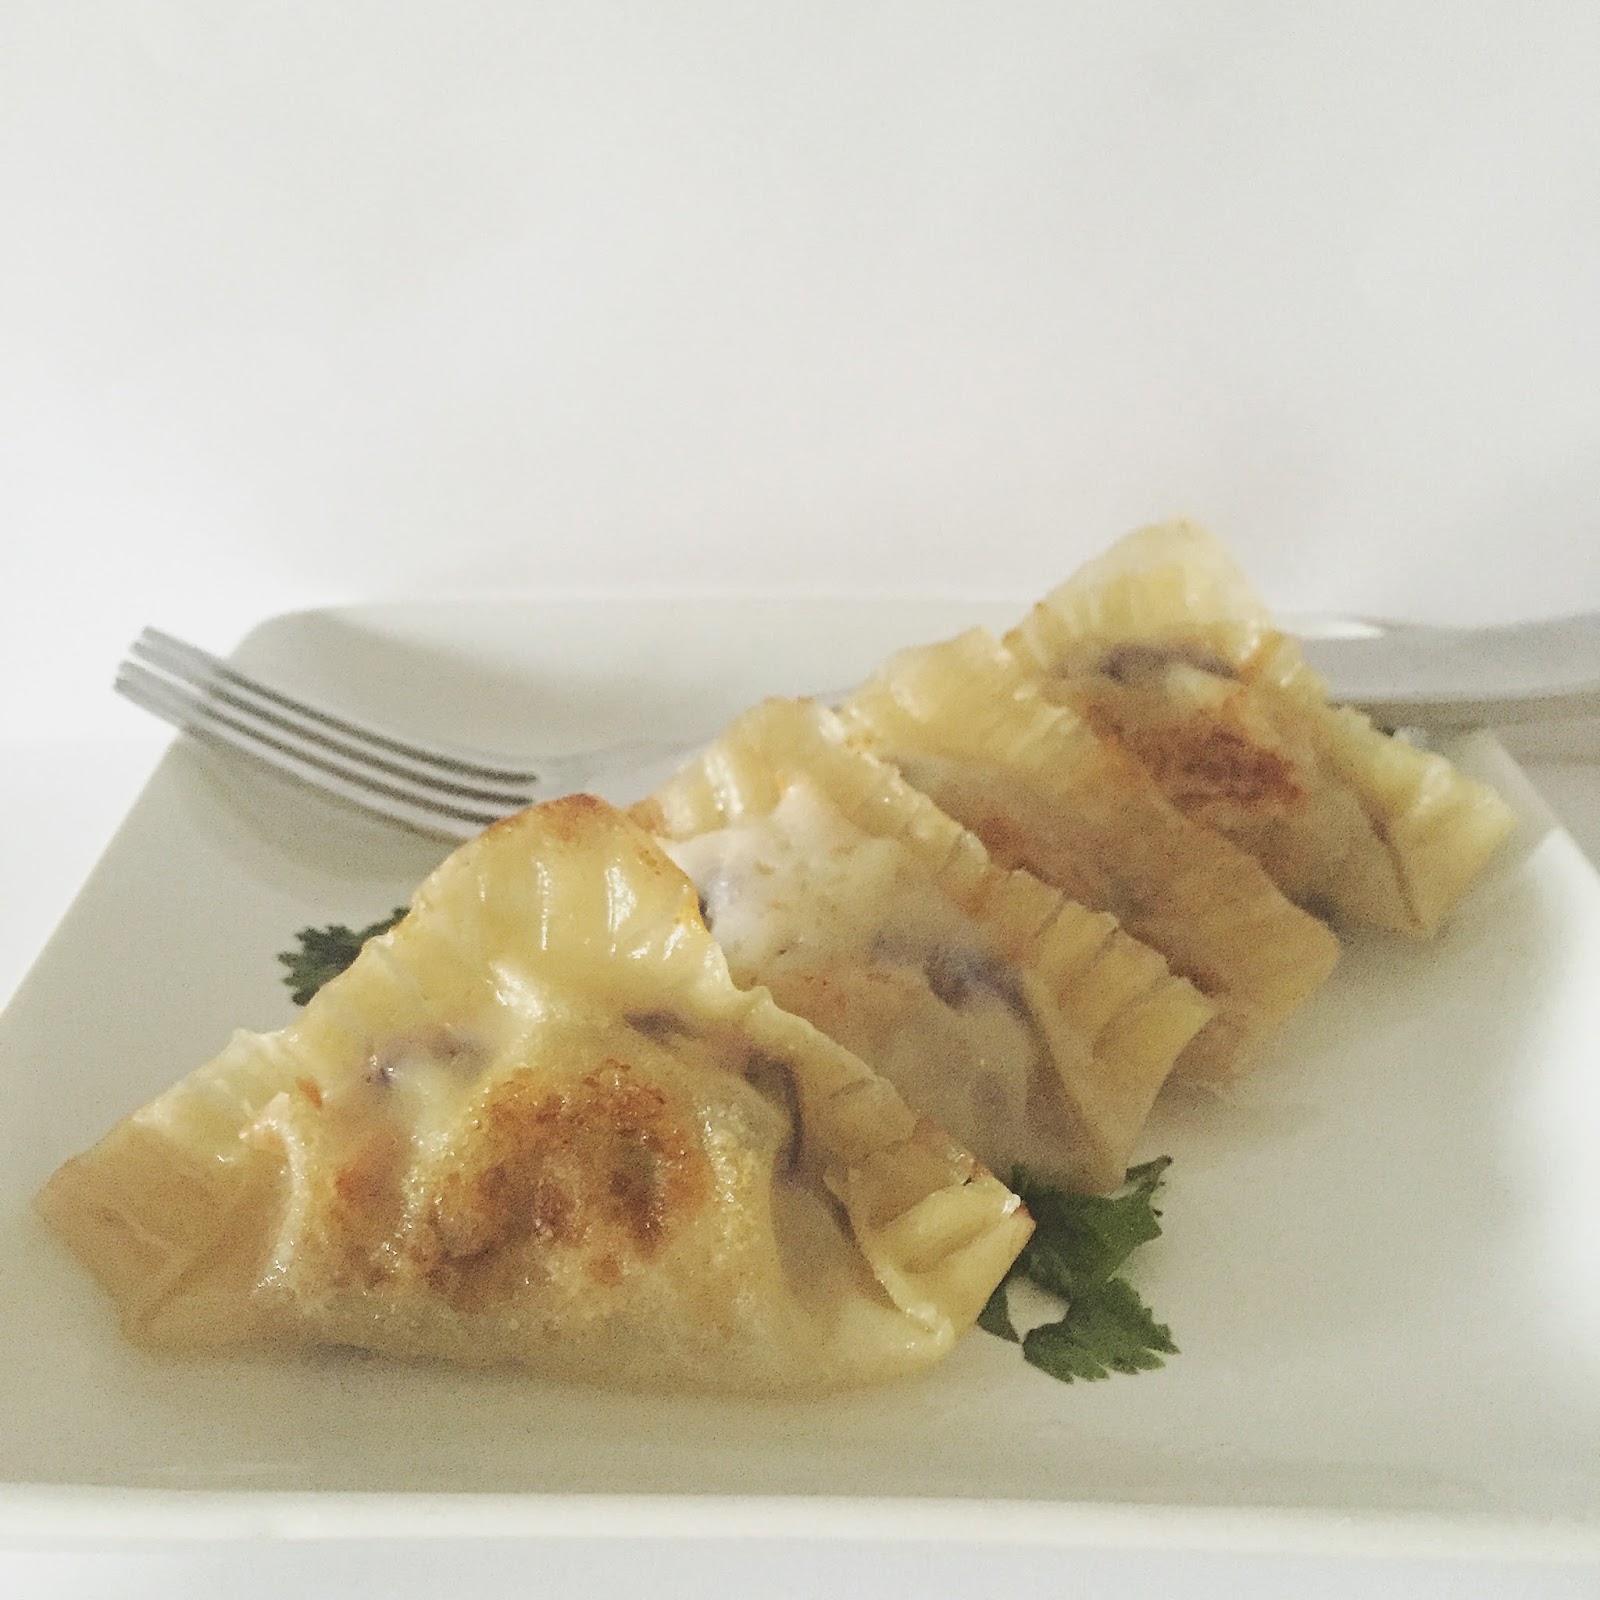
- There are undoubtedly multiple ways (most prettier than mine) to fold a potsticker. The method I used was what made sense to me and relatively quick and simple. I folded it into a triangle, then folded each corner over and crimped all the edges with a fork. I completed the process until all 48 were complete and put them in a dish so that I could fry them in large batches.
- In a large skillet on your stove top, add 3 tbsp of vegetable oil on medium heat. Once the oil has become hot (drop a small amount of water to the oil, if it sizzles the oil is ready) add the potstickers to the pan. I did mine in batches of 10.
- Saute on both sides about 1 minute, or until a light golden brown color appears.
- Add 1/3 cup water to the hot pan and put the lid atop. Let steam for 3-4 minutes and remove from the pan. Complete the process until all dumplings are cooked. Consume. Eat happy!