
This post is sponsored by GoodPop.
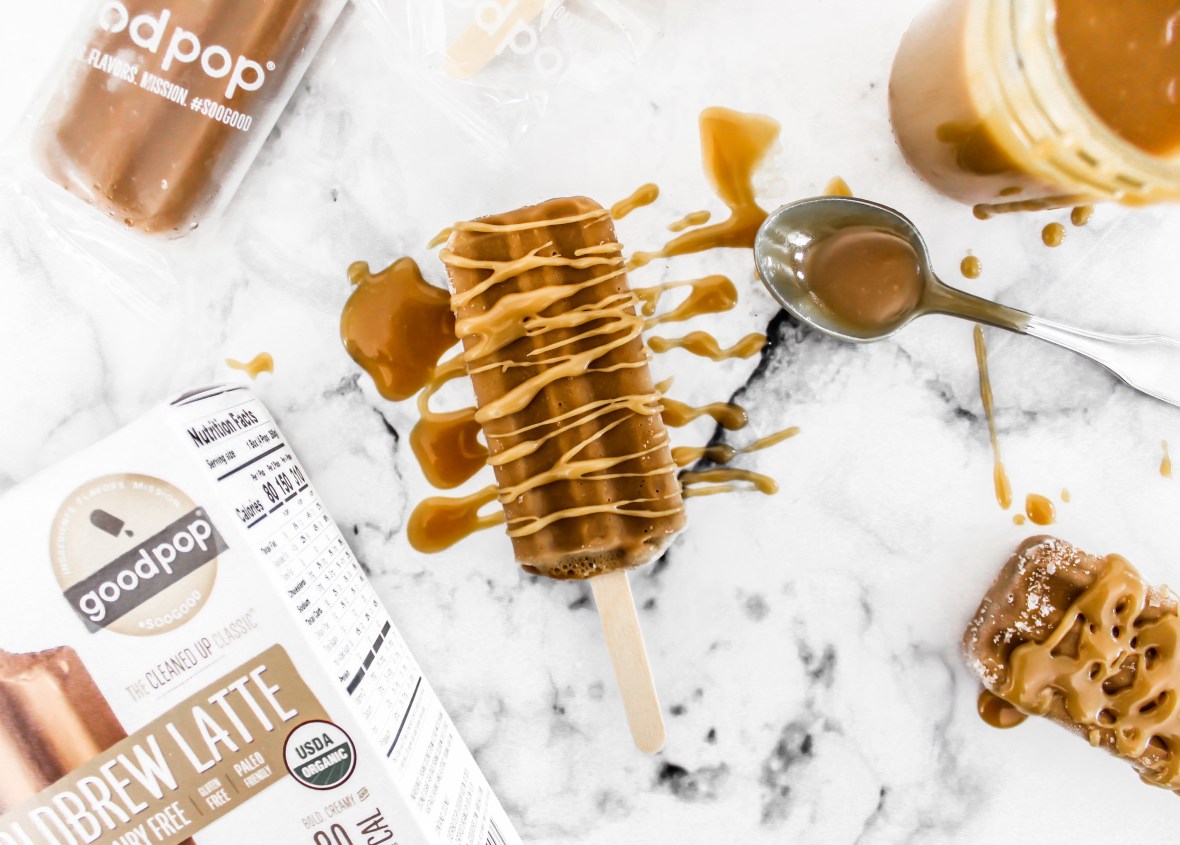
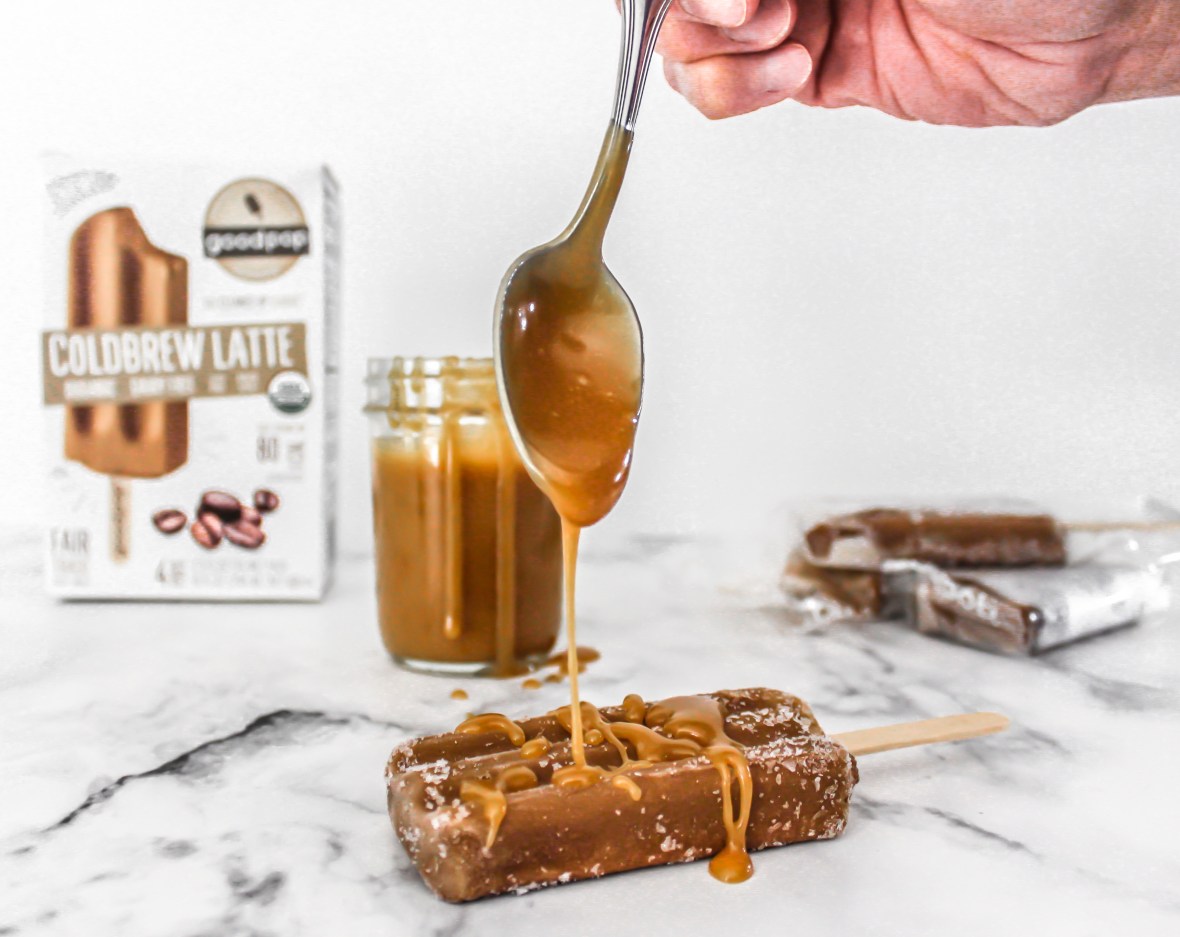
This caramel sauce is so very delicious. What’s even better? It’s made with just three simple ingredients and comes together in less than 7 minutes. It makes the perfect drizzling addition to any sweet treat, but especially these GoodPop Cold Brew Latte frozen pops! Forget a caramel macchiato. This is so much more enticing and made with clean ingredients!

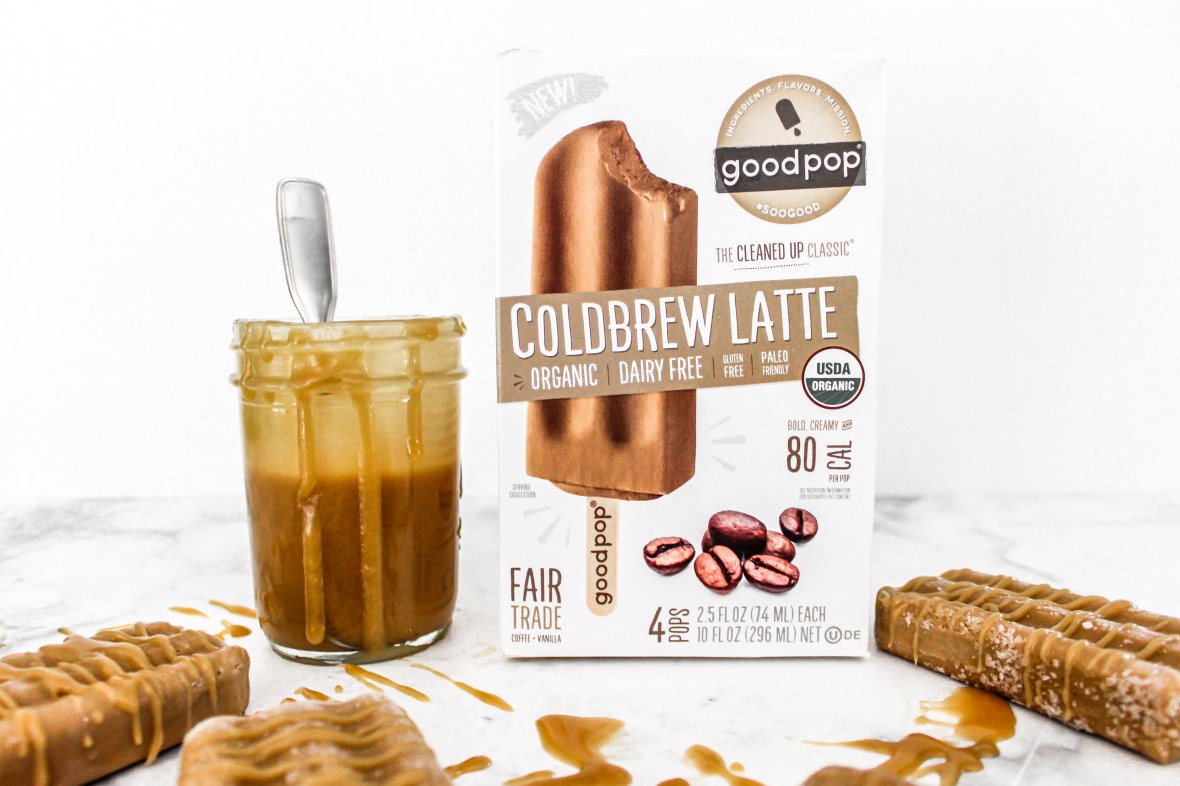
GoodPop’s Coldbrew Latte flavor is one of my absolute favorites! It’s a creamy blend of organic, fair trade coffee and organic coconut cream. With just the right amount of coffee for an afternoon pick-me-up. What’s more: the company pledges to do good. The “Good” in their name isn’t just about their ingredients or the way their GoodPops taste, it’s about the company’s commitment to using their products as a vehicle to do social Good. Through responsible ingredient sourcing (Non-GMO, Fair Trade, Organic, and local) and non-profit & humanitarian efforts, they’re a small company with a big passion for doing good and giving back.
Enjoy this afternoon snack or any of the GoodPop frozen treats for less! Head to their site and enter GMK20 at checkout for 20% off your order! This simple caramel sauce would be a perfect addition to any of their frozen pops!
Recipe yields just under 1 cup caramel sauce and can be refrigerated for up to 4 days, covered. Bring to room temp before drizzling.
Ingredients:
- 1/2 cup (1 stick) organic salted butter
- 1 cup packed brown sugar
- 1/4 cup organic half + half
- GoodPop Organic Coldbrew Latte frozen pops
Method:
- Add the first three ingredients to a medium sized saucepan.
- Cook on medium-low heat for 5-6 minutes, whisking constantly until the sauce thickens.
- Drizzle on a GoodPop Organic Coldbrew Latte frozen pop. Enjoy!